
Export Tags Help
Location and Name of exported Dataset file

Tagging re-invented and fully integrated
into the Windows File Explorer

Export Tags Help
Export Tags helps you create a batch (.bat) file that can be used for doing a repeated export of your Tag groups, Tags and all linked Files and Folders. A wizard will help you with this process.
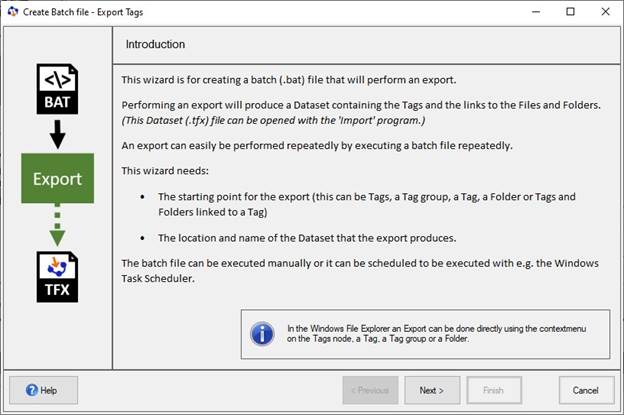
Note that the export can be done directly in the Windows File Explorer, using the contextmenu on the Tags node, a Tag, a Tag group or a Folder.
On this screen you choose what you want to be exported.
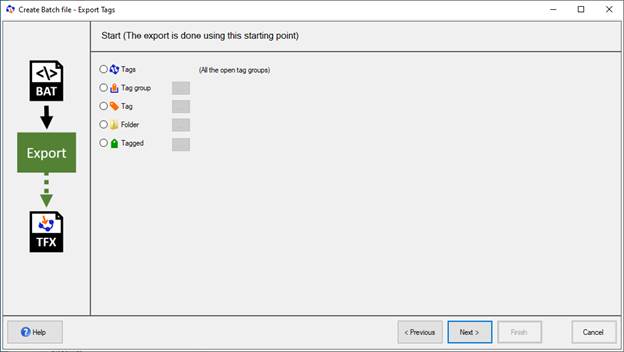
By choosing Tags all open Tag groups and the underlying Tags and the links to Files and Folders will be exported.
By choosing Tag group you can select a Tag group for export. The Tag group with all underlying Tags and the links to Files and Folders will be exported.
By choosing Tag you can select a Tag for export. The Tag and all underlying Tags and the links to Files and Folders will be exported.
By choosing Folder you can select a Folder for export. All underlying Files and (Sub)Folders that are linked with a Tag will be exported, including the linked Tag.
By choosing Tagged you can select a starting Tag for export. Every single linked Folder or Tag of this starting Tag, is processed as described above in Folder and Tag.
On this screen you choose the name and location of the exported Dataset file.

The default location for the exported Dataset file is “c:\users\[Username]\Documents”. This can be changed by pressing the ellipsis button and a folder selection dialog is shown.
The default name for the exported Dataset file is Exported_ followed by the selected date/time. The name can be changed by editing the text.
By selecting this option you can choose the date/time format that will be appended to the name of the Dataset file. The following formats are provided:
· yyyy-MM-ddTHH-mm 2020-01-01T13-01
· yyyy-MM-dd 2020-01-01
· yyyy-MM-ddTHH-mm-ss 2020-01-01T13-01-30
· dd-MM-yyyy 01-01-2020
· dd-MMM-yyyy 01-Jan-2020
· dd-MMMM-yyyy 01-Januari-2020
· yyyy-MM-dd_HH-mm 2020-01-01_13-01
· # The date/time represented as a number. This number represents the number of 100-nanosecond intervals that have elapsed since 12:00:00 midnight, January 1, 0001 in the Gregorian calendar.
It is possible to enter your own custom format between the brackets in the Name as well.
By selecting this option the exported Dataset file wilt have the extension .tfx.
Based on the location and name settings the Result and an Example are shown.
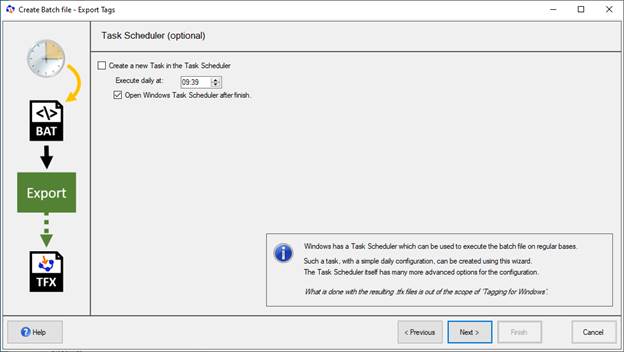
On this screen you can choose to create a Task in Windows Task Scheduler, this is optional. The Task is based upon the created batch file. If you choose to create a Task in the Windows Task Scheduler you can specify the time on which the Task will executed daily. If you select ‘Open Windows Task scheduler after finish’ the Windows Task Scheduler will be opened after the wizard finishes and you can further configure the created Task.
On this screen a summary is shown.
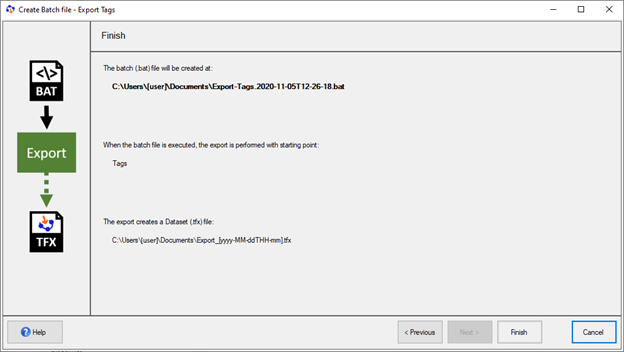
The summary contains:
· The name and location of the batch file that will be created.
· Starting point of the export.
· The name and location of the Dataset file that will be created by the export done with this batch file.